2016
Digital Tutors / Pluralsight
Simeon Elson
5:40
English
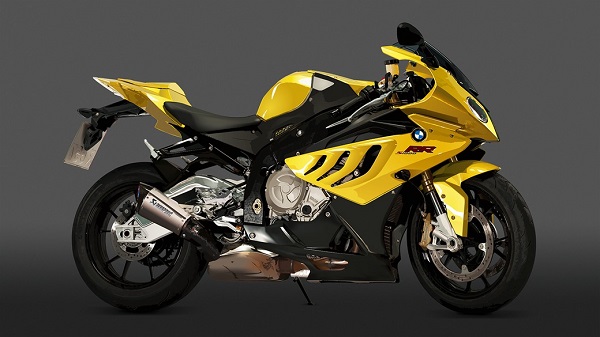
In this Illustrator course, we'll learn how to produce a photorealistic motorbike illustration.
It's essential to keep in mind every part of the process, so we'll keep things like shadows and highlights on separate layers. We'll start by applying the shadows of the motorbike using a combination of the eyedropper tool, pen tool and custom brushes.
Next, we'll work on the metallic elements of the motorbike using the gradient annotator, pen tool, and mesh tool. Then we'll use a combination of the mesh tool and the gradient annotator to generate the yellow shiny areas.
We'll add logos and type to the motorbike with brushes, the pen tool and the eclipse tool. Finally, we'll add realistic textures the design by creating custom patterns and adding texture masks.
After finishing this course, you'll be ready to start attracting clients with your own photorealistic illustrations.
1 Introduction and project overview
2 Discussing the render process and starting the illustration
3 Blocking in the deep shadows
4 Employing the Pathfinder Minus Front feature
5 Constructing the deep shadow areas
6 Generating smooth outlines with custom brushes and the ellipse tool
7 Applying shine to the wheel shadow areas
8 Continue forming the shine gradients highlights for the front wheel
9 Executing red realistic gradients
10 Forming the base of the tires
11 Adding depth and shadow to the tires
12 Administering the inner rim shadows to the tires
13 Generating highlights for the tires
14 Finish executing the highlights for the tires
15 Using the mesh tool for the bodywork
16 Coloring our mesh shape to establish realism
17 Implementing the shadow elements using the mesh tool
18 Enhancing the shadow application
19 Adding highlights to the bodywork
20 Forming the highlight strips
21 Creating the chrome areas of the motorbike
22 Completing the chrome areas with shadows and highlights
23 Producing the shiny metal areas
24 Adding contrast to the metallic mesh shapes
25 Executing the yellow paint work
26 Implementing highlights to the paint work
27 Generating the paintwork deep shadows
28 Producing the lights and glass areas of the motorbike
29 Drawing the metal wheels
30 Forming the exhaust pipe
31 Administering the bodywork texture
32 Completing the bodywork's plastic texture
33 Evaluation of the realistic vector motorbike tutorial
digitaltutors.com/tutorial/2350-Designing-a-Vector-Illustration-for-Advertisements-in-Illustrator
Download File Size:4.48 GB