2013
Digital Tutors
Justin Marshall
02:10:00
English
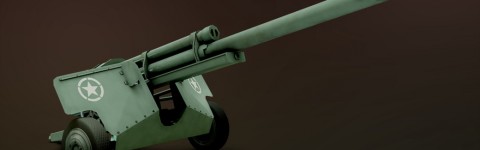
In this course we will cover techniques for texturing assets in 3ds Max and Photoshop. When building low resolution models meant for real-time applications, texturing will play a big part in communicating a lot of information about that model. Many of the details that we are unable to add when modeling can be simulated with textures. In addition, we can simulate lighting effects or occlusion in textures. In this course, we'll go through the process of preparing our model, an antitank gun, for texture by creating and assembling useable UV layouts. We'll then use a variety of techniques in Photoshop to paint texture maps for the gun. Finally, we'll bake out an ambient occlusion map that we can integrate into our texture. Upon completion, you'll have a textured gun, but you will also have the knowledge you need to start creating textures for your own models.
1. Introduction and project overview 01:01
2. Beginning the UV layout on the shield 08:53
3. Creating UVs for the trail and base 09:57
4. Laying out UVs for the wheels 09:21
5. Finishing the UVs on the carriage 07:55
6. Creating UVs for the barrel assembly 10:39
7. Putting together a cohesive UV layout for texturing 10:32
8. Exporting UV reference images and beginning the textures 07:02
9. Adding dirt and rust 09:35
10. Integrating photographic images into the texture 09:40
11. Adding and modifying the wheel and tire textures 10:43
12. Adding the spring texture 07:55
13. Adding the hand wheel and creating an opacity map 05:59
14. Applying and viewing our textures in 3ds Max 06:58
15. Creating ambient occlusion maps 11:36
http://www.digitaltutors.com/tutorial/196-Texturing-Game-Props-in-3ds-Max-and-Photoshop
Download File Size:535.69 MB