2014
Digital Tutors
Pierre Derenoncourt
01:10:00
English
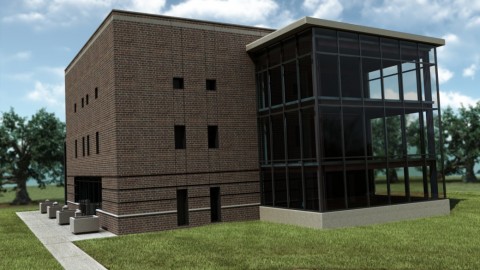
In this set of tutorials, we'll learn how to use Revit to model, document and present a renovation project. We'll begin the process with an architectural model of the building we're planning on remodeling. We'll learn how to start working with phasing and the phase filter by setting all existing building elements to their proper phase. Next we'll edit the model and determine which elements to demolish and which elements to keep. Once we've set the stage for our project we'll begin modeling the new portion of the model starting with the foundation and eventually the exterior wall enclosure. Finally, we'll learn how to use design options to present multiple design solutions for our project. By the end of this tutorial, you'll learn how work with project phasing, design options and set up views to illustrate important details about your project.
Introduction and project overview 1 Introduction and project overview Watch it now 01:02
Setting the existing building to the correct phase 2 Setting the existing building to the correct phase 10:31
Determining what portion of the building to demolish 3 Determining what portion of the building to demolish 06:02
Setting up the substructure of the addition 4 Setting up the substructure of the addition 08:42
Modeling the foundation of the addition 5 Modeling the foundation of the addition 07:57
Modeling the superstructure of the addition 6 Modeling the superstructure of the addition 07:34
Adding the roof to the new addition 7 Adding the roof to the new addition 08:13
Modeling the floors for the new addition 8 Modeling the floors for the new addition 07:23
Exploring the views created by phasing 9 Exploring the views created by phasing 04:46
Using the Design Options tool 10 Using the Design Options tool 06:57
http://www.digitaltutors.com/tutorial/1803-Renovation-Projects-in-Revit
Download File Size:507.69 MB