2014
Lynda
William Everhart
1:37
English
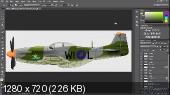
Learn to use Adobe Illustrator and Photoshop to create realistic and beautiful aircraft profiles. Designer William Everhart teaches you how to research your subject and gather reference material (in his case, for a classic WWII American fighter, the Mustang), and then prep an Illustrator document for this unique workflow. He shows how to create the line work for your illustration, and add base colors, camouflage, and unit markings. Then the drawing is handed off to Photoshop, where William adds depth and signs of realistic wear and tear. The results are saved to a final master file and exported in two formats: one for the web and one worthy of printing and displaying on a wall
Introduction
Welcome
What you should know before watching this course
Using the exercise files
1. Research Your Subject
Finding appropriate reference materials
Taking your own source imagery
2. Preparing the Illustrator Document
Creating a new Illustrator document with layers
Placing your reference materials
3. Creating Your Line Drawing
Where to start your drawing
Drawing separate aircraft sections
Propellers and other rotors
Drawing additional details
4. Adding Color and Markings
Masking your work
Adding base colors
Applying camouflage patterns
Illustrating bare metals
Applying nose art
Adding serial numbers and unit markings
5. Handing Off to Photoshop
Export to Photoshop
The Smart Object workflow
6. Adding Realism with Photoshop
Adding depth to panel lines
Adding highlights and shadows
Applying wear and grime effects
Alternative camouflage workflow
7. Exporting for Print and the Web
Saving a master file
Exporting for print
Exporting for web
Conclusion
Next steps
Download File Size:221.92 MB