2013
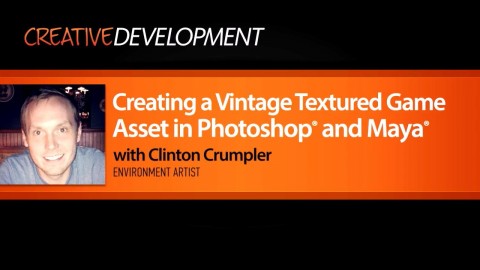
Digital Tutors
Clinton Crumpler
03:10:00
English
The overall goal of this project is to learn how to create stylized textures and materials for games. This tutorial will focus on the creation of a vintage sign asset using multiple texturing techniques in Photoshop and ending with a real time version of the sign in game (UDK) with working materials for lights. Using this knowledge, you will be able to create your own assets and understand stylization when it comes to creating textures and establishing identity within game art.
01. Introduction and project overview 01:03
02. Concepting and pre-process 05:04
03. Modeling the base sign 07:33
04. Modeling the smaller signs 10:49
05. Modeling extra parts 11:40
06. Creating the UVs 10:05
07. Setting up mirrored UVs and finalizing UV layout 06:00
08. Preparing UVs and Photoshop file 04:21
09. Creating base color and color palette 08:53
10. Painting edges and lines in Photoshop 10:47
11. Creating and painting with a custom bolt brush 07:30
12. Creating the lights and starting the emissive layers 09:23
13. Creating a custom brush and adding grunge layer 19:12
14. Setting up layer overlays and blending modes 05:16
15. Finding fonts and adding type to the sign 10:53
16. Finishing the diffuse and setting up the emissive map 16:55
17. Importing the assets into UDK 15:28
18. Creating the neon bulb texture 10:49
19. Creating the neon material and mesh 05:45
20. Finishing the neon diffuse texture 04:58
21. Finishing the neon material and conclusion 05:57
http://www.digitaltutors.com/tutorial/1419-Creating-a-Vintage-Textured-Game-Asset-in-Photoshop-and-M
Download File Size:1.41 GB