2015
Lynda
Bryan O'Neil Hughes
1:22
English
Many cameras save photos in a raw format; it's the best way to capture all the data the sensor is capable of recording. In this course, Photoshop principal product manager Bryan O'Neil Hughes shows how to get the most from that data, using the raw-format processing power of Photoshop CC and Lightroom 6.
First, take a look at converting raw-format photos to the DNG format in Lightroom and using its Develop module to improve their contrast, color, and tone. Then find out how to adapt your raw workflow when you're on the move—on a mobile device or simply migrating from an application like iPhoto or Aperture. Next, Bryan switches over to Photoshop and its powerful Camera Raw plugin to optimize raw-format images and video. Along the way, he draws important comparisons between Photoshop and Lightroom, ending with tips for round-tripping back to Lightroom and creating camera profiles to make sure you're getting the most rich and accurate results from both programs.
Introduction
Welcome
What you should know before watching this course
Exercise files
A short history of Adobe Camera Raw (ACR)
1. Lightroom: Import and Library
Importing and converting to DNG
Setting up your files in Lightroom
HDR
Pano
2. Lightroom: Develop Module
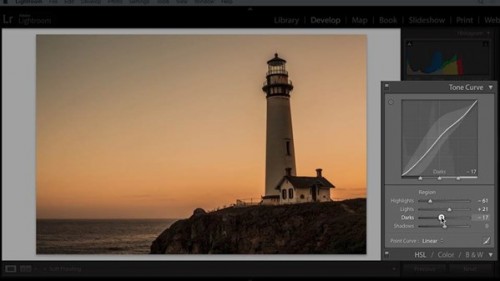
The Basic panel and the tone curve
Color, black and white, and toning
Detail and effects: Sharpening, noise reduction, lens correction, and effects
Tools
Exporting and archiving
Workflow video
3. Photos and Photo Libraries on the Move
Mobile applications and assessing files on mobile
Migrating files from iPhoto and Aperture
4. Adobe Camera Raw and Photoshop
Where Photoshop comes in
An overview of ACR (Adobe Camera Raw)
Smart Objects
Multiple files and presets
Using ACR as a filter
Dodging, burning, and sharpening
Video in ACR
Workflow
5. Exporting and Accessing Files
Round-tripping back to Lightroom
DNG Profile Editor
Conclusion
Next steps
Download File Size:407.01 MB