2010
Video2Brain
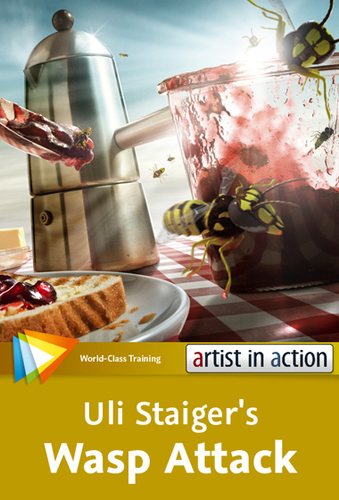
Uli Staiger
1hrs. 5mins.
English
In Wasp Attack, master Photoshop artist Uli Staiger takes you step by step through the process of using Photoshop to create a composite image from several different source images. Following his instructions, you’ll combine the source images, create realistic-looking shadows and lighting throughout the composite, and add a swarm of wasps. You’ll accomplish all this through a series of simple, easy-to-follow lessons that give you plenty of room to add your own artistic touches to the final product.
Setting the Table
Opening the Starting Image
Creating Transparency
Painting a Shadow
Adding an Area of Dark Shadow
Warming Up a Shadow
Creating a Reflection
Nondestructive Brightening Techniques
Brightening by Painting with White
Choosing the Right Blending Mode for Brightening
Adding the Wasps
Inserting and Scaling a Wasp
Adding the Wings
Adding Motion to the Whole Wasp
Creating a Swarm
Creating the Lighting
Painting a Sun into the Sky
Adding Sunlight
Applying Refraction
Creating More Sunbeams
Brightening the Sunbeams
Softening and Blurring the Sunbeams
Applying the High Pass Filter
Desaturating with a Black & White Adjustment Layer
https://www.video2brain.com/en/courses/photoshop-artist-in-action-uli-staigers-wasp-attack
Download File Size:294.68 MB