2014
Digital Tutors
Lee Megalhaes
02:10:00
English
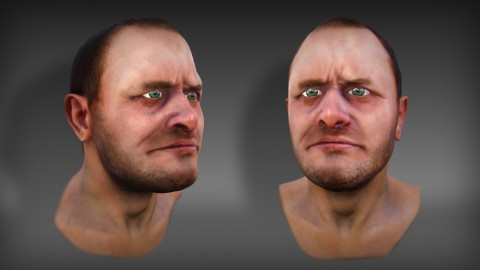
Throughout these lessons we'll focus on problem solving and shortcuts for painting realistic skin textures in ZBrush using Spotlight. We'll also go through the visualization and setting up process for our shaders and lights in Marmoset Toolbag. By the end of this tutorial you should have more than enough knowledge to apply these techniques to create your own realistic human models.
Introduction and project overview1Introduction and project overviewWatch it now01:10
Taking a look at our project assets2Taking a look at our project assets08:14
Painting using reference images in Spotlight3Painting using reference images in Spotlight10:30
Adding neck textures4Adding neck textures10:14
Hand painting the ears and neck5Hand painting the ears and neck10:14
Removing lighting from our model's face6Removing lighting from our model's face10:06
Cleaning up the beard and hair7Cleaning up the beard and hair11:49
Finalizing our texture map8Finalizing our texture map12:54
Creating UVs and baking maps9Creating UVs and baking maps06:50
Setting up shaders in Toolbag 210Setting up shaders in Toolbag 210:09
Arranging lights in Toolbag 211Arranging lights in Toolbag 207:44
Creating gloss and specular maps12Creating gloss and specular maps11:28
Playing with post effects in Toolbag 213Playing with post effects in Toolbag 210:13
Taking a look at our final render14Taking a look at our final render07:45
http://www.digitaltutors.com/tutorial/1721-Painting-Realistic-Skin-Textures-in-ZBrush-and-Marmoset-T
Download File Size:1.35 GB