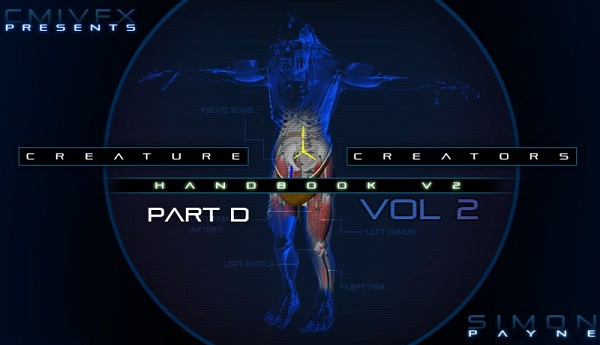
2015
cmiVFX
Simon Payne
3:00
English
These are some of the most essential aspects of facial rigging and skinning that you can find. Volume 2 part D of Creature Creator's Handbook will take your rigging and animation work to a whole new level. Our expert mentor, Mr. Simon Payne, demonstrates how to add blendshapes and their controls, you'll learn how to automate the mirroring of blendshapes, you'll learn about the spSimpleControls tool and the spRenamer utility, fine-detail facial controls, using our own save/load utility for skin weights, solving skinning issues, and overall optimization of the puppet rig. This is top-notch instruction that simply can't be found anywhere else and Simon Payne's teaching methods are absolutely fantastic. This is rigging and animation at its finest. NOTE: If you're new to this course, you'll need to watch volume 1, as well as volume 2 part A, part B, and part C before beginning part D. Due to the large amount of information covered in volume 2 of this course, it has been split into five parts labeled A, B, C, D and E. You'll need to watch the entire course to fully understand this material. So, if you're all caught up on the previous material, enjoy Creature Creator's Handbook Volume 2 Part D.
Facial Rigging
There are many takes on facial rigging, the most common ones being blendshape-driven, and joint-driven systems, with accompanying off-face control sliders, or attribute/sliders. For me, using joints, for the most part, is no better, but slower, than blendshapes...ultimately, moving a joint creates a shape...so it may as well be sculpted exactly how you would prefer, and used as a blendshape. I use joints in addition, for certain re-positioning control over finite detail in areas such as eyelids and lips. But I mostly use well thought out blendshapes that are based on the main movements of your many facial expressions, and give the animator the ability to form any such expressions and shapes they desire, using blendshape-based building-blocks of facial movement. I will be following this up with the addition of muscles simulation and additional deformers in volume3.
Adding Key Blendshapes and Controls
Building the main face rig separately for speed and flexibility, and I guide you through integrating that back into the main rig toward the end of this chapter. Here, I guide you through my main facial blendshapes. For me, off-face controls or controls that do not move with the face are simply not intuitive to animate with. So we add some non-obtrusive facial animation controls that move with the deformation of the face. We use some controls, such as eyelids and eyebrows to action multiple blendshapes for controlling “..up†and “..down†shapes with the one control.
Automating Mirroring, Using spSimpleControls tool, and spRenamer utility
We introduce a tool that helps you automate mirroring of blendshapes and hooking them up to the blendshape node. I finally also give you a proper user-guide to spSimpleControls for generating and managing animation controls fast and simply, including colours, naming and grouping. In conjunction I also guide you through using my powerful renaming utility spRenamer, and sequential naming using alpha-numeracy and prefix/suffix naming conventions.
Fine Detail Facial Controls
Main movement of the lips is one thing, but reshaping or repositioning the area where lips join or animating smaller, finer areas is another. Likewise, we may be able to close eyelids, but what if we want the position of the seem to change position or shape. Here we add a joint-based insertion to the overall blendshape and add animation controls to manipulate it. We are not covering sticky-lips in this section, as it is more appropriate as a higher-level-deformation technique to be considered for vol3.
Integration
Finally, we cleanup the facial rig and integrate it seamlessly into the main rig, inclusive of various visibility switches.
Our Own batch-Skin-save/load utility
Introducing spSkinSaver for batch/individual saving and loading of skin-weights. This tool deals with influence clashes and will update skin weights on selected models or bind-load-weights on models which have no current skinCluster. This makes model updates and pose-adjustments far simpler and makes updating skin weights between puppet and deformation rigs problem-free. It was necessary to include this due to the limits I was experiencing demonstrating certain issues earlier in the volume. I felt it was best to just give you a great solution for this problem so that I could continue with good demonstrations.
Solving Skinning Issues
Maya’s new weights smooth and hammer tool was very buggy in maya 2012 when we looked at skinning issues in volume 1. The performance is much better in volume 3 so I felt it necessary to revisit this subject in brief. We are not diving too deep into skin weights at this point, as it will be far more important in volume 3 when we are setting up the deformation rig. We do however look at a very common problem with scenes of large scale, when a rig is moved quite far from the origin. Skin weights will often have very tiny amounts less than or greater than 1.0, which will not show up on the deformation of skinned geometry under normal circumstance. But the further you move a rig away from its point of creation, the more those tiny weight values are going to affect vertices visibly. So it is common to get a crinkled or stretched look to a skin, even though you spent a long time painting weights seemingly perfectly. I demonstrate how merely pruning, with interactive normalization can solve this problem instantly and why you should always check for this problem before handing over a rig for animation. We also cover mirroring skin weights.
Optimization
Finally, we go about making final checks to our puppet rig and optimizing it by adding another geometry display option. I show you how to write a very simple script that will make hooking up rigid cut-up geometry to joints, and renaming each piece of geometry at the same time, a very quick and painless process. As a result, we can now apply the stress-feedback shader that we created earlier in this volume when rigging the spine system. From here we will introduce you to both Mel and Python scripting-for-riggers properly, in the final part E of this volume.
Download File Size:4.91 GB