2014
Digital Tutors
Laura Smith
07:50:00
English
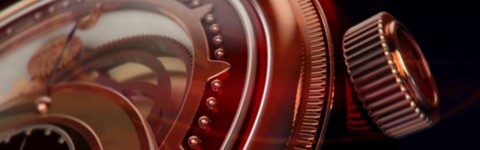
In this series of tutorials, we will learn how to take a sketch for a watch idea from the initial design all the way through to the composited render. This tutorial takes a full pipeline approach so that you can see every step that it takes to design, model, texture, animate, light, render and composite a full product visualization. We begin in Illustrator designing a path rendering of the watch as a top down view. We then save those paths to be used as splines in CINEMA 4D. After bringing our splines into CINEMA 4D, we use many different modifiers to bring the splines to life as 3D geometry. After our modeling is finished, we texture and light our shot. We add a few camera shots to fully showcase the aspects of our model that are most appealing. We then take the rendered frames into After Effects to do a full composite; complete with lens flares effects and much more. By the end of this training, you'll know how to take a simple sketch idea from it's infancy to a polished 3D portfolio piece.
01. Introduction and project overview 01:10
02. Beginning our watch design 08:01
03. Creating the first gear 07:14
04. Duplicating cogs for the gear 07:20
05. Creating a gear one-third the size of our first gear 06:15
06. Creating decorative patterns for the insides of the gears 07:06
07. Making spirals for the gear decorations 06:48
08. Designing the watch faces 05:14
09. Adding detail to the watch face07:05
10. Making a far outer rim with our existing path 03:13
11. Adding minute ticks 04:31
12. Designing the hands 06:31
13. Saving our Illustrator paths and outlines to use as splines in CINEMA 4D 03:19
14. Setting up the CINEMA 4D project and importing paths to CINEMA 4D 08:35
15. Creating the main watch casing 08:53
16. Creating the outer rims with a sweep 08:30
17. Using extrude with our watch faces and hands 06:51
18. Extruding the gears 03:24
19. Trouble-shooting splines that create problematic geometry 05:49
20. Creating the large gear from multiple splines 08:26
21. Using an array and boole to make the minute ticks 08:11
22. Using booles to make room for the gears 08:00
23. Creating glass for the face and inner section 07:55
24. Sweeping the circles for realistic details 05:31
25. Creating the filigree for the outside edge 06:31
26. Modeling the band connectors 06:46
27. Using MoGraph to create the watch band 08:12
28. Finishing the watch band 06:46
29. Using a deformer to edit the watch band 04:16
30. Creating the wind 07:47
31. Adding final details 07:54
32. Building the main rose gold texture from an existing shader 07:41
33. Creating materials that complement our rose gold 07:51
34. Applying textures for maximum contrast and readability 08:32
35. Using Selection tags to apply multiple textures on a single piece of geometry 08:12
36. Setting up Camera 1 07:03
37. Setting up Camera 2 07:57
38. Setting up Camera 3 08:44
39. Setting up Camera 4 03:43
40. Creating a gradient for our environment lighting 02:37
41. Setting up our main lights 07:22
42. Setting up additional lights 07:28
43. Finishing the light setup 08:57
44. Using planes of geometry to bounce light on reflective surfaces 04:20
45. Troubleshooting geometry issues 03:23
46. Editing the assignment of our materials 03:30
47. Tweaking our materials 08:33
48. Editing the key light 03:27
49. Setting our render settings 06:54
50. Checking our render with the external renderer 08:23
51. Adjusting the Camera focus distance for maximum contrast in our depth pass 08:02
52. Splitting the project into multiple projects for easier rendering 07:30
53. Adding subdivisions on a shot-by-shot basis 09:33
54. Rendering our shots 03:33
55. Importing our passes into After Effects and organizing them 04:21
56. Using the ambient occlusion passes 07:26
57. Creating depth of field with Camera Lens Blur and the depth pass 07:36
58. Faking depth of field with Adjustment Layers 07:55
59. Using the alpha pass with the depth pass to fix areas of incorrect blur 09:06
60. Using the alpha pass to replace the background 03:51
61. Adding vignette and filter flare ghosts 08:55
62. Creating tracks for lens flares 08:00
63. Adding lights and parenting them to the null objects 06:00
64. Creating lens flares with Knoll Light Factory 08:26
65. Editing the look of the lens flares 08:47
66. Keying the flare brightness over time 08:59
67. Creating astigmatism and chromatic aberration 05:25
68. Adding our watch brand logo with a mask reveal 05:51
69. Using the pixel motion blur effect 04:34
70. Transitioning between shots 06:07
71. Rendering our watch commercial to a sequence 02:58
http://www.digitaltutors.com/tutorial/1492-Designing-Elegant-Product-Visualizations-in-CINEMA-4D-and
Download File Size:3.73 GB