2014
Digital Tutors
Kurt Jones
01:40:00
English
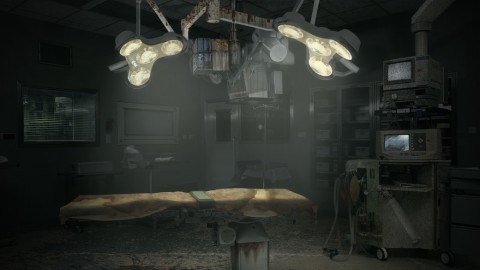
We'll begin this process by examining the image that we'll be working with and learn how we can begin to prep the image by removing any unwanted shadows and reflections. From here we'll use adjustment layers and layer masks to change the overall lighting scheme for our image and establish a new light source. Following this we'll spend several lessons pushing the overall mood of our interior scene to appear grungy by applying various types of textures. Along the way we'll learn how we can use smart objects, free transform, and blend modes to achieve the look that we set out to capture. After watching this tutorial you'll have the inspiration to change the lighting and mood of images in Photoshop.
1 Introduction and project overviewWatch it now 01:04
2 Image analysis and prepping 09:08
3 Continued image analysis and prepping 07:48
4 Darkening our scene and revealing lit areas 08:28
5 Brightening up elements of our scene 08:44
6 Refining lit areas and painting cast light 08:38
7 Adding texture to the floor and ceiling 08:35
8 Adding texture to the operating table 08:09
9 Applying rust textures to ceiling fixtures 08:24
10 Refining the appearance of our rust textures 06:02
11 Adding a splatter texture to the floor.06:18
12 Adding texture to other objects in the scene 06:04
13 Final image adjustments 09:46
http://www.digitaltutors.com/tutorial/1614-Interior-Lighting-Manipulation-in-Photoshop
Download File Size:1.19 GB